Introduction
An essential piece of software for every computer is an Anti-Virus. An Anti-Virus protects your computer from many common viruses and trojans which can be deadly for you system. Avast Anti-Virus Free Edition is very good and effective FREE Anti-Virus.
An essential piece of software for every computer is an Anti-Virus. An Anti-Virus protects your computer from many common viruses and trojans which can be deadly for you system. Avast Anti-Virus Free Edition is very good and effective FREE Anti-Virus.
Downloading/Installation
Please visit this link: http://www.avast.com/eng/down_home.html and download the version that matches your language.
Please visit this link: http://www.avast.com/eng/down_home.html and download the version that matches your language.
Once you have downloaded it locate the file that you just downloaded. The icon should appear like the image below:
Now double-click on the file to launch the installation of Avast!
Next you'll see this screen:
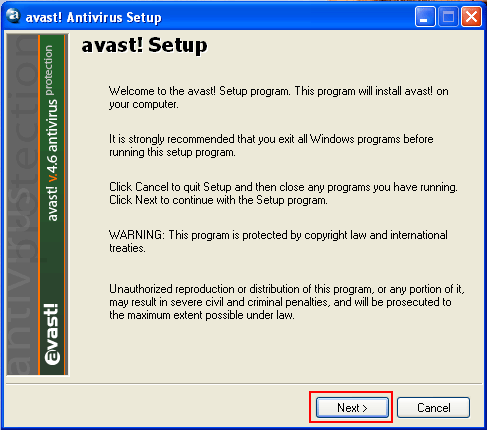
Click next.
You will get another window with the ReadMe File, just click Next, again.
Now you get the beloved Legal Agreement, just click I agree, and then click Next to continue. You will now see an image similar to the one below:

I would recomend using the "Typical" installation. Make sure Typical is selected then click Next.
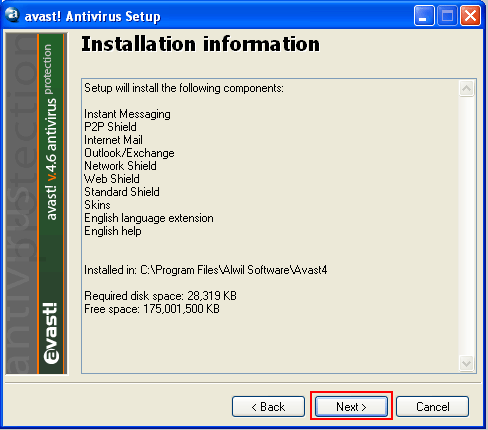
Now if you selected "Minimal" you won't see "skins" here. After reviewing this for a second and confirming that what you have on your screen is similar to mine, click the Next button. (Note: the "Free Space" will vary from computer to computer. Since I have about 170 Gigabytes free that is why my Free Space is so large.)
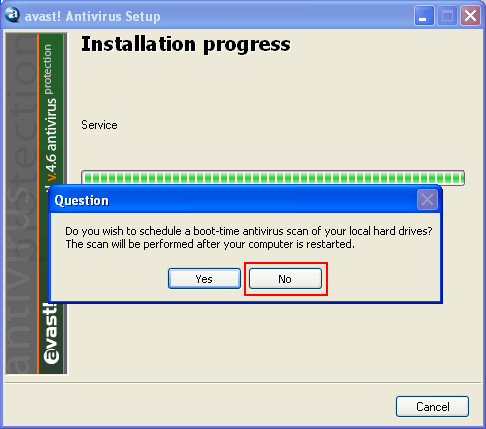
After pressing Next, you will get the above message. Basically if you select Yes it will do a quick scan of your hard drive upon boot-up. This scan will start before you log-in into Windows. I recomend you select No, because even though this scan will only happen once, this scan can take quiet a while. It took almost an hour for my hard drive.
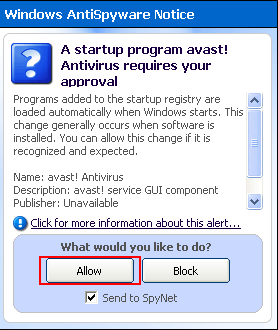
If you have Microsoft Anti-Spyware, or other similar program installed you may be prompted with a similar message. Click the Allow button to allow this change to take affect.
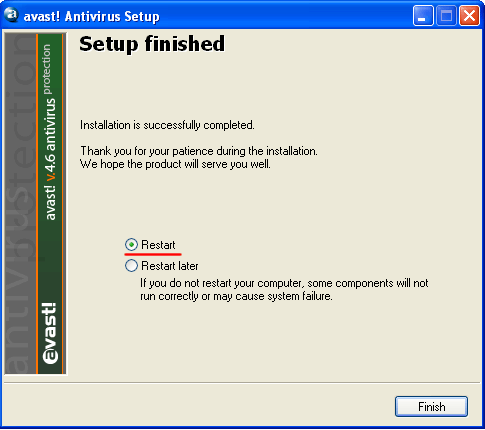
Now you have to restart your machine. I highly advise you to select Restart and then click Finish.
After you restart you will get a message about Avast! it will give you the general "Hello and Thank you for choicing our Product." Also after you restart you will notice 2 new icons in the bottom right corner of the screen.
The icon with the I is for the "Virus Recovery Database" (VRDB). What this does is virutally makes copies of the program you have installed and if one of them gets infected with a virus this will replace the files infected so the program function like before. The A is the On-Access Protection.
Very Important - after restarting, right click on the A in the taskbar and select Updating, the highlight Program.
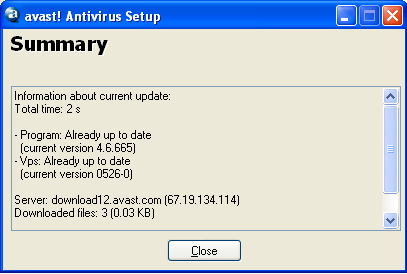
You will get this popup after its done updating. If Avast! had to download anything for your computer you may get a message asking you to restart.
Now right click on the A in taskbar and click Start Avast! AntiVirus.
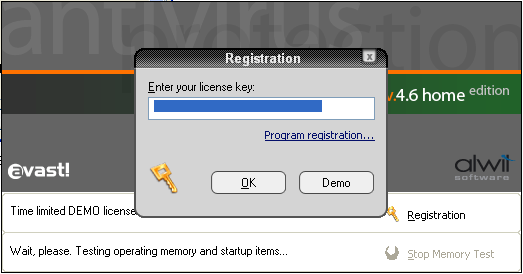
Click Program Registration and you will be taken to their website. Fill out the form and then check you e-mail. Once you get an e-mail from them (usualy about 1 minute after submitting the form) copy and paste the serial they provided into the highlighted box. Then click ok.
Now you will see this screen. Click the little hard drive like icon in the top right corner, below the X.
Click each icon on the right once until the options in the center read:
- Scan local drives: ON
- Scan removeable media: ON
- Scan selected folders: ON
C:\
Also adjust the slider at the top from Standard Scan to Thorough Scan, and make sure to check "Scan Archive Files."
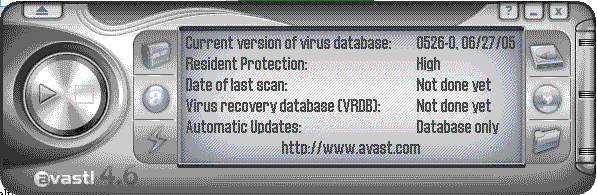
Now click on the A on the middle left side and adjust the Resident Protection from Standard to High.
Ok now to set-up and configure the On-Access Protection.
- Right click on the A on the taskbar
- Click On-Access Protection Control
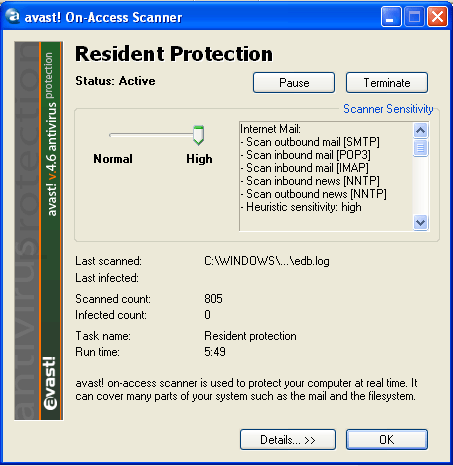
I recomend changing the default slide from Normal to High, depending on how fast your system is.
What makes Avast! unique is that it scans many parts of the system. It scans Instant Messenging, Internet Mail, Network Shield, Outlook
/Exchange, P2P Shield, Standard Shield and Web Shield. So regardless of what you do on the computer you will be protected no matter what.
To schedule a scan: (from: http://forum.avast.com/index.php?board=2;action=display;threadid=3796)
- Go to Start > Programs > Accessories > System Tools > Scheduled Tasks
- Click (or double-click) on Add Scheduled Task
- In the wizard that appears click Next - a list of programs will appear
- Click Browse and navigate to C:\Program Files\Alwil Software\Avast4 (or whatever folder in which you installed avast!)
- Click (or double-click) on the file ashQuick.exe
- On the next screen give the task a name of your choice and choose how often you want it to run and click on Next
- On the next screen choose the appropriate scheduling options and click on Next
- On the next screen enter the user name and password for the Windows user you want the task to run as, then click on Next
- On the next screen check the box for the option "Open advanced properties for this task when I click Finish" , and then click Finish
- On the next screen, in the "Run" field you will see the path for the ashQuick.exe program. After the closing quote enter a space and type in the path(s) that
you want scanned. Multiple paths must be separated by a space and any paths that include a space in the path name must be in quotes. Here are a couple of examples:
"C:\Program Files\Alwil Software\Avast4\ashQuick.exe" C: E: - this will scan the entire contents of the C: and E: drives
" C:\Program Files\Alwil Software\Avast4\ashQuick.exe" "C:Program Files" E:Downloads - this will scan the contents of the Program Files folder on the C: drive and the Downloads folder on the E: drive, including all subfolders (Note the first path is in quotes due to the space in the folder name "Program Files")
- Click OK
- In the Scheduled Tasks window, from the menu, click on Advanced and choose "Start Using Task Scheduler"
- To test your newly created task, from the Scheduled Tasks window, right-click on the task's icon and choose "Run" from the popup menu. If the scan doesn't begin correctly you'll get an error message. The problem is most likely in the scan path (missing quotes or something like that.)
- Close the Scheduled Tasks window
No comments:
Post a Comment